Category Archives: cooking

Zero Waste Week: Use it or Lose it

This week has been zero waste week, I’ve been remiss in marking it on the blog but not at all remiss in observing my part of it at home

I think I might even be an Ambassador for ZWW which makes my shame all the greater.  Quick go over there and check out the cool stuff I keep forgetting to blog about!

The view from our local park.

The view from our local park.

I chose to focus on food because whilst I work hard to reduce waste there are always things I could do better and new tips and tricks to try out. This culminated in an ultimate Zero Waste Meal that I am incredibly proud of because almost all the ingredients were grown or made by me!

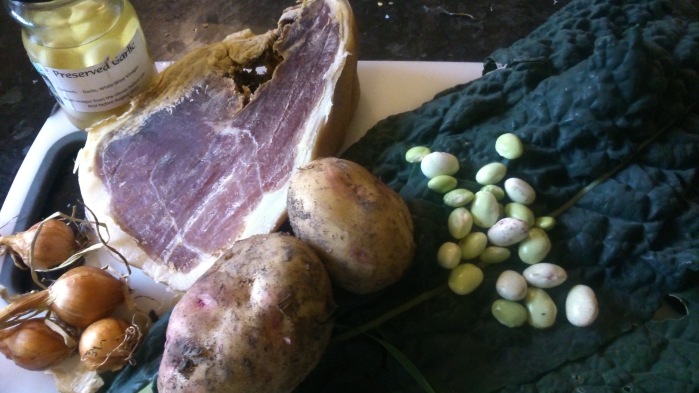
The meal was Potato and Kale stew and my ingredients looks liked this:

DSC_0776

Shallots (grown by us)

Garlic (grown and preserved by my Dad)

Cavelo Nero (grown by us)

Potatoes (grown by us)

Borlotti Beans (grown by us)

Parma Ham (grown and made by us)

Leftover shredded chicken (remnants of 4 chicken carcasses I used for stock)

2 cubes of chicken stock (made by me, reduced until concentrated and frozen in ice cube trays)

1.2 litres of whey (leftover from cheesemaking I used it to rehydrate the stock cubes)

Smoked Paprika (shop bought)

Olive Oil (shop bought)

The method was pretty simple after that..

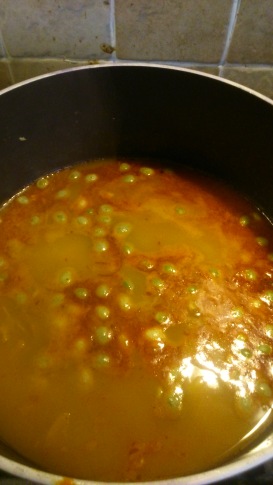
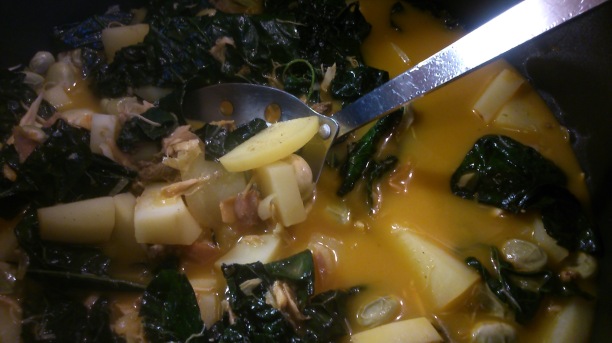
Fry the shallots and garlic in the oil until softened and add the potatoes and ham.  Then add the paprika, chicken, whey and stock cubes and simmer for about 20 mins or until the potatoes are done.  Then add the cavelo nero (destalked and roughly chopped) and the beans – cook for another 10 mins.  Voila!

DSC_0779

It was incredibly flavourful and highly nutritious with all the extra protein from the whey and of course that Superfood darling – Kale!

DSC_0780

Growing your own food is really waste saving in so many ways, there is no packaging and no air miles, you only pick exactly what you need so nothing rots in the veg drawer and any trimmings can go on the compost heap to be put back into the soil.

Over the week I’ve been looking out for more food waste saving tips to pop down here:

1. Chillis – my chilli plants failed this year so I’ve had to buy them from the Supermarket.  I always get more than I need in a pack.  So I read online that you can just throw chillis straight in the freezer in a container and when you need them, get them out and use them as if they were fresh.  I have about 4 chillis in the freezer right now!

2. Milk – I over ordered milk recently and ended up with double what I needed.  I froze one of the bottles and use the other to make Paneer Cheese.  I used this blog post and the final recipe in it is for Queso Blanco which (as it turns out) is the same as paneer!  I used some of the whey in the above stew instead of water and the rest I’m freezing in portions for baking.

3. Preserving – as a Gardner with a lot of fruit trees at this time of year I am rushed off my feet trying to preserve the harvest.  Currently I’ve made two plum cakes, 7lbs of Damson Jam and nearly 3 litres of Blackberry Cordial.  There is much more to come this weekend.  There are lots of good jam and chutney recipes online and if you use homegrown or foraged produced they will often cost pennies.  Our 3 litres of Blackberry Cordial cost under a £1. I can’t bear to see blackberries rotting in the hedgerows near to a supermarket where they are being sold at £1.75 for 150g!

4. Pizza Sauce – I love this idea by A Girl Called Jack for making pizza out of leftovers.  I often have a couple of tablespoons of veggie stew, chilli, bolognese leftover and nothing to do with it.  How come I didn’t realise I could use it as pizza sauce!

Tarragon and veg frittata

This is a favourite recipe of mine. Frittata is an easy stand-by supper, which tarragon adds a robusy, almost meaty flavour to.

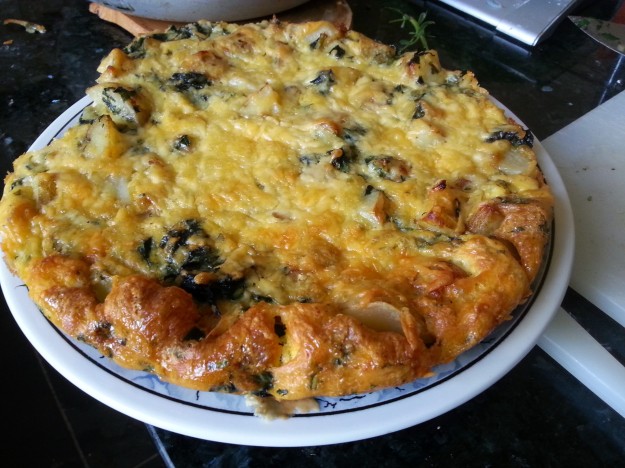
Most of this meal was prepared using stuff grown in our garden.

Most of this meal was prepared using stuff grown in our garden.

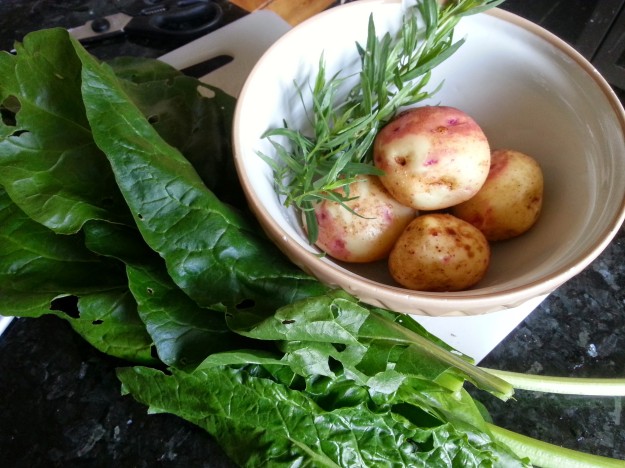
It’s easy enough to cook. The default recipe involves lightly frying some chopped onion, then adding half a kilo of cubed potato and frying for 10-15 minutes longer, then finally add a chopped courgette and fry for a few minutes more. On this occasion I substituted some spinach, of which we currently have a glut, for the courgette. I wilted it in the pan and then chopped. I reckon this would work ok with lots of different green veggies – kale, cabbage, chard, peas even.

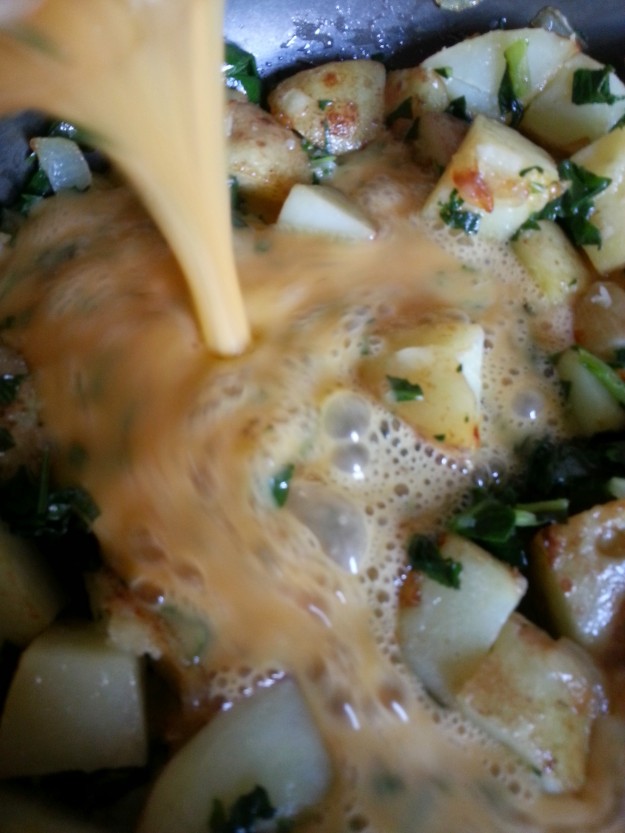
Add eggy goodness.

Add eggy goodness.

Once the veg is done, add half a dozen eggs that have been beaten together with chopped tarragon. A good amount of chopped tarragon is needed, say a couple of tablespoons.

Top with cheese and bake in the oven for 30 mins at 180 C.

Feeling hungry now.

Feeling hungry now.

The result is delicious, filling, healthy and easy to transport for picknicking. Indeed, this is exactly what we did with it – an afternoon walk in a local wood munching on frittata (and Becky’s home-made chocolate cake) was a very pleasant way to pass the time. T Rex was particularly impressed and got quite upset when there wasn’t any left!

The Art of Recipe Substitutions: Hummous.

I’ve been writing my use it or lose it posts for some time now – long enough that they have their own page!

When I write a use it or lose it recipe I try hard to come up with something that doesn’t need you to buy a lot of extra ingredients.  To me that defeats the purpose – when I realise I need to use up some yoghurt I don’t want to have to go out shopping and buy lots of new things just to use something else up before it goes off, that is an inefficient use of my time and might lead to more waste.

To me Use it is or Lose it is about making a complete meal or most of a meal, or something you can put in the freezer

But there are times when instead of building a quick store cupboard recipe around a Use It or Lose It item I just substitute something I have that is about to go off for something else.  I want to use up the tiny bit of leftover yoghurt instead of opening a brand new pint of milk.  Once I’ve opened the milk the clock starts running before it goes off, so I want to put that off for as long as possible. And if I don’t the yoghurt up now I’ll probably have to throw it away.

Sometimes we have a guest who is vegan, gluten free, or has a dairy allergy and substitutions need to be made.  It is fairly easy to substitute a part of a meal on a plate swopping out pasta for potatoes if someone is gluten free.  The tough challenge comes when you are substituting an ingredient like eggs, or you have some sour cream about to go off and you are about to make a recipe with a more complicated set of chemical/biological processes like bread.

The key to substituting is understanding the role that the ingredient plays in the recipe and then choosing something (or a combination of things) that will do the same job.

I think there are 5 ingredient roles:

1. Flavour (e.g. garlic, cheese, herbs, spices)

2. Texture (e.g. lentils, potatoes, pasta)

3. Structure (e.g. gluten)

4. Binding agent (e.g. eggs, chia seeds, sometimes just water/milk)

5. Raising agent (e.g. bicarbonate of soda + acid, baking powder, eggs)

(This is a theory in progress, I’m sure I’ll end up changing this list. If you think of anything then let me know!)

I’ll show you how I do it with a very simple case study: Hummous

Hummous – this is a great one for substituting and an easy starting point.  Here is the basic recipe with the ingredients broke down into roles.

A) 1 tin of Chick Peas (Texture, Flavour, structureA)

B) 1 tablespoon of Tahini (Binding and Flavour)

C) 2 tablespoons lemon juice (Flavour)

D) Olive oil to blend until required consistency (Binding, Texture and Flavour)

E) Seasoning to taste (Flavour)

F) Clove of garlic (Flavour)

Put all the above in a food processor and blitz until you get your desired texture.

Here are the ways you can substitute. You can pick almost any combination of these as long as the flavours work together and you use the same  – it might not be true “Hummous”, but it will be a tasty, homemade recipe that will be nutritious and enjoyable and hopefully avoid waste or an extra trip to the shops.

Substitute Hummous

A) Any tinned beans like butter beans, cannellini beans, black beans, kidney beans (not baked beans or anything in a sauce), dried chickpeas or beans (soaked and cooked), defrosted frozen broad beans/peas or cooked fresh broad beans/peas.

B) Any nut or seed butter e.g. peanut butter, almond nut butter etc. Here is my recipe on how to make your own nut butter so you could go a step further and substitute this step just with nuts and oil as long as you make it into nut butter first.

(bonus tip: you won’t have to wash the food processor in between!)

C) Any fruit juice that is a bit sharp (but not orange or grapefruit – that would be too weird a flavour with the garlic) I’ve used pear, apple and pineapple with great results but you could use water in a pinch. (Thanks to Free Our Kids for this tip – everyone loves the apple juice version!)

D) Any oil.  I’ve use Rapeseed with great results.  I also think this is a good place to use up the fancy oils you buy for a recipe that needs 1 tsp and nothing more or the oils you get bought in those posh salad dressing gift sets.  Because of this I’ve tried walnut and hazelnut and they have both been lovely!

E) Pick herbs and spices that go with the juice and beans you have chosen, we have a low salt diet because of R at the moment so instead of salt I’ve used lemon rind and fresh coriander, fresh mint and smoked paprika.

F) this is the garlic bit, you could substitute a garlic flavoured oil at D above, or add garlic chives or even just chives.  But in a worst case scenario leave it out.

Obviously how the above combine will matter. If you make a “hummous” with peanut butter, chick peas water, olive oil and no garlic it will taste completely different than if you use broad beans, lemon and mint.  You do need to develop a sense of which flavours go together and I started to do that by just switching out one ingredient at a time and seeing what worked.

Also use your imagination if you can imagine the combination of garlic and orange tasting pretty unpleasant then it probably will be (at least it will be to you!)

Some of the substitutions might just stick.  Now I make Hummous with almond nut butter and apple juice as standard because everyone prefers it that way here at Westwick.

The Undisputed Champion of using up food and making substitutions is of course the amazing Jack Monroe from A Girl Called Jack.  She is one of my favourite bloggers and has such a great mind for thinking sideways and using ingredients really creatively. Go and check her out!

A lovely break in so many ways.

We’ve been away for a few days to Sussex for a beautiful, hippy wedding and I took the opportunity to leave my laptop behind and try a few days mostly offline.  Several bloggers having been talking about taking days offline and I had a sneaking suspicion I’d really enjoy so on the spur of the moment I decided I’d join in.  It was so spur of the moment I had packed my power cable!

Here is a picture of R at the wedding, rocking his homemade tie dye T-shirt and eating a stick. MMMmm tasty stick!

DSC_0744

It was very refreshing and definitely something I’ll do again.  It probably would have been more refreshing if I hadn’t dealt with the slight stress of managing a 13 month old in a B&B for the first time but he was very easy going (as usual) and our B&B hostess was fantastically accommodating and so helpful.  I’d recommend the B&B to anyone staying in East Grinstead, East Sussex and here is her website: http://www.brambletyemanorbarn.co.uk/

The wedding was lovely, it was held at a Glamping site which was beautiful, the ceremony was in a woodland glade and the festivities were all informal, held in a field and barn with a big marquee and amazing views.  The weather was hot and sunny all day and there were parachute games, tug o’ war, rounders, and plenty of space for the army of little children to run around.  It was wonderful!

I’ve come back feeling a little torn between enjoying the time offline and wanting to get back to blogging and everything else.  So I think I’ll be trying to work out a sustainable way of blogging going forwards.

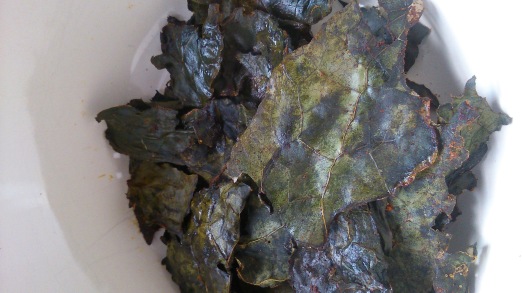
In the meantime I got back from Sussex to find that my Cavelo Nero (Italian Black Kale) was ready to eat.  I Love Cavelo Nero, it is my undisputed Empress of Kale and we started out having it for dinner last night and then early this morning I made a quick batch of these Kale Chips which I highly recommend.  There are some amazing tips in here that link so please do check them out.

DSC_0746

I must finish writing my big No Plastic July Round Up post soon!


Westwick Ham – the Grand Unveiling

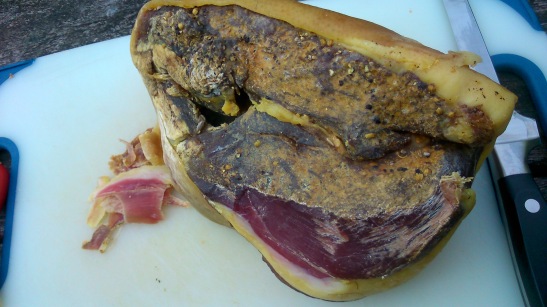
Over the weekend the 4 month wait to sample our own Parma Westwick Ham was up.  It was a very exciting moment and really lovely that my Dad who helped us make it 4 long months ago was here to sample it.

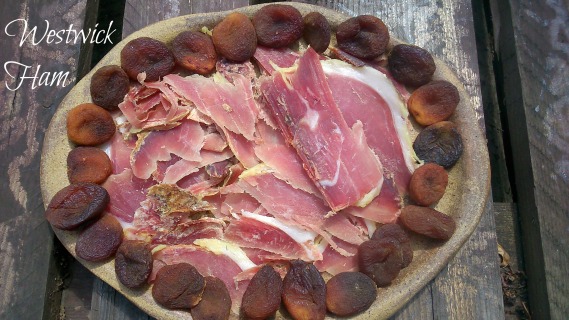
Westwick Ham

Westwick Ham

Soon after they arrived I took it down from the Verandah ceiling.  It was as hard as wood which I took to be a very good sign.  No squishy bits and no foul smell. When I unwrapped it it looked less than inspiring, a bit of mould on the outside but again nothing to indicate it was rotten or otherwise good to eat.

Looking underwhelming at first.

Looking underwhelming at first.

I think in this day and age where most food is neatly packaged in plastic, looking completely sterile the idea of eating meat that has not been cooked and in fact has been hanging in my verandah miles away from a fridge or freezer is… disconcerting.  But I trusted to Hugh Fearnley-Whittingstall and the millions of farmers (especially Italian and Spanish) who have been there before me.  I am so pleased I did.

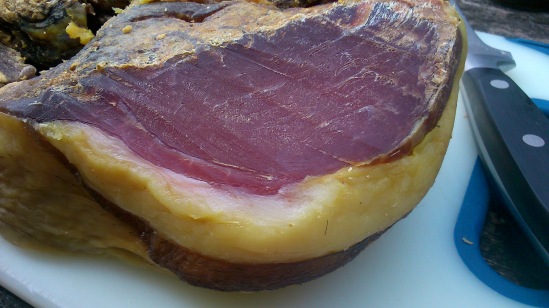
I gave the ham a good sniff and it smelled like… well like Parma Ham. Then we tasted it.  It was delicious,  salty and just like Parma Ham!

Looking better.

Looking better.

We carved up a big batch (that took forever by hand (this stuff really is like wood!) to take to my Uncle and Aunt’s House warming party and paired it with some dried apricots to take the edge of the saltiness of the Ham.  It was a huge hit and it was totally exciting to contribute something so unusual that we had made.

Next time we will be making double the quantity and we are thinking of looking for a second hand meat slicer because it really was very hard to slice.


Use it or Lose it: Cheese

We love cheese – we eat lots of it and lots of different types.  But there often seems to be a little dried out husk in the fridge or even several.  Parmesan and Pecorino are fine, I save the rinds and add them to soups and stews to give extra flavour. But there are so many other delicious cheeses in my life and in my fridge.

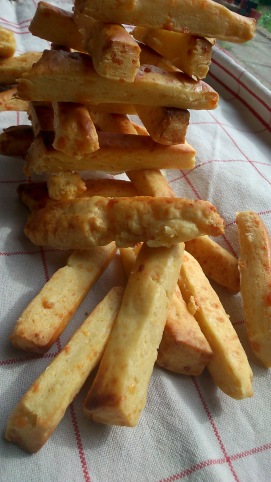
Jenga cheese straws

Jenga cheese straws

I originally made these cheese straws for No Plastic July but even as I was making them I realised they were a great way to use up those little hard ends of cheese.

Recipe is here but I have tweaked it as usual.

Cheese Straws

Ingredients

(Recipe says it makes 36 straws.  I got a lot more out of the recipe!)

  • 375g/13oz plain flour

  • 225g/8oz butter, diced

  • 150g/5½oz assorted grated hard cheese (cheddar, double gloucester, wensleydale, cheshire etc.)

  • 50g/1¾oz freshly grated parmesan cheese

  • pinch English Mustard powder

  • small pinch cayenne pepper/paprika

  • 2 free-range eggs, yolks only (beaten)

  • Ice cold water 4-5 tablespoons.

Method

This is essentially a pastry recipe and I am generally very bad at making pastry on account of having hot hands.  So I make all mine in a food processor and the results are always lovely.

Sift the flour and put in the food processor with the butter.  Whizz until it resembles bread crumbs.  If you don’t have a food processor then rub the butter into the flour until it resembles bread crumbs. If you run the mixture through your (clean) fingers for a bit you should be able to feel if the butter is evenly distributed. Add all the other ingredients except the water either to the food processor for a final blitz or just stir into the mixture.

Then add the ice cold water a little bit at a time stirring/blitzing until it comes together in a ball.

Put the ball in a bowl with a plate on top and put it in the fridge for at least 30 mins.

Pre-heat the oven to 190C/375F/Gas Mark 5.

Take the dough out of the fridge and roll out on a floured surface until it is the thickness of a £2 coin (maybe 1/4 inch if you are not British). Then cut into strips the desired length and width of your cheese straw and place on a baking tray with a sheet of greaseproof paper on it.

Brush a little milk on the tops of the straws and then bake for 10-15 mins until they are golden brown on top.

I apologise about the eggs yolks only instruction – I should definitely do a Use it or Lose it Egg Whites edition soon.  Throwing away eggs whites is a guilty secret of mine, I know I could make meringues but do far I haven’t.

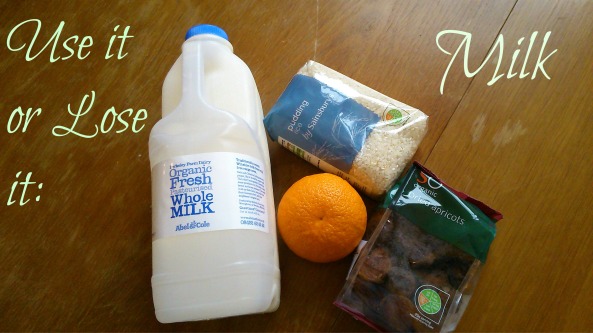
Use it or Lose it: Milk

Today’s Use it or Lose it Post is Milk and it has two recipes for the price of one blog post.

I had a 2 litre bottle of Organic milk which was *cough* a couple of days past it’s sell by date.  But I used my nose and it smelled fine so I set about using it up.

Too much milk!

Too much milk!

My big hitter for using up milk is always pancakes because we always have eggs and flour on hand. I use a really simple recipe:

1 mug flour (any kind)

1 mug milk (any kind)

2 medium eggs

I whisked all of them together and then left it to rest for 30 minutes.  Then fry in butter in a frying pan.  I always fry big crepe style pancakes in a huge frying pan and then cut them in half (you cook breakfast faster that way).

My real recipe here though is Rice Pudding.  I was never a fan of rice pudding until I met Eliza Acton’s Rich Rice Pudding (from Delia Smith’s Complete Cookery Course).  This I love, it comes with a creamy, custardly layer on top.

I have tweaked Delia/Eliza’s recipe to make a chocolate/orange version instead of a lemon/nutmeg version.

Ingredients:

110g short grain rice

850ml milk

75g sugar or 125g of chopped apricots soaked in orange juice and then blitzed in the food processor.

50g Butter

3 eggs

Grated rind of 1 orange

3 squares of dark chocolate

Method

Preheat the oven to gas mark 2/300F/150C.

Butter a baking dish.

Put the rice and milk in a saucepan and bring it slowly to simmering point and heat slowly until the rice is almost cooked (Delia says about 10 mins). Add the sugar/orange and apricot mixture the butter, the orange zest, and the chocolate.  Heat slowly and stir until the chocolate is melted throughout the pudding.

Leave it to cool a little.

Whisk the eggs and stir into the pudding.  Then pour the whole mixture into the baking dish and bake in the oven for 30-40 mins.

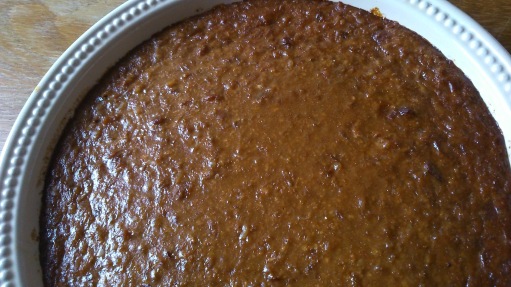
Chocolately rice pudding goodness

Chocolatey rice pudding goodness

Serve with cream (always – this part of the recipe is not optional!).

I’ve given two recipes here because although the rice pudding is lovely it contains ingredients you might need to buy.  If you are in a Use it or Lose it situation you probably don’t have lots of other ingredient to play around with like in the rice pudding.  I do find it frustrating when I see “leftovers” recipes calling for a bunch of unusual or expensive ingredients.  If I need to use something up in a hurray I won’t have some other weird and wonderful things. Therefore the pancake mix at least is full of simple staple ingredients.

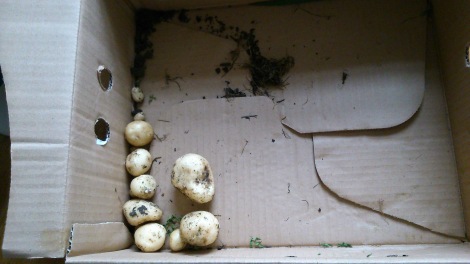
In other news we dug up our first potatoes.  I think you’ll agree we were a bit early.  We’ll be waiting a bit longer for the next lot 🙂

Earlies are a bit too early :(

Earlies are a bit too early 😦

I also harvested all our redcurrants.  I’ll be making some redcurrant pies shortly to swap with my Dad for some redcurrant jelly.  We got 965g out of the fruit bushes.  I had a quick look on line and the best price I could find for fresh redcurrants was £2 for 150g.  My harvest would have cost us £12.86 in the shops!  That will be some lovely pies in the Winter for just the cost of the pasty.

Use it or Lose it – Mushrooms and Stilton.

This post is following on from my previous Use it or Lose it entries here and here.

If you are going to use every scrap of what you buy I think it is key you have a set of recipes which play to your strengths, your tastes and your needs. We love mushrooms and Stilton and we often buy Stilton to have as an eating cheese for lunch. We grow many (but not all sadly) of our own herbs – so it is easy to chuck some sage, lovage or fennel in a recipe.

This is a recipe which evolved from having a few crumbs of Stilton and half a pack of mushrooms left and we have made it many many times.

Mushroom, Stilton and Sage Pasta Sauce

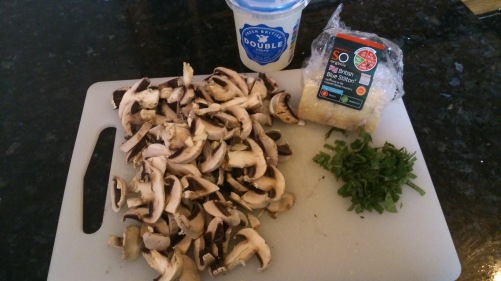
Ingredients

Ingredients

Ingredients (Feeds two adults and one child)

1 small onion sliced

1-2 cloves of garlic minced

Olive oil

250g Mushrooms

40g Stilton cubed

125ml Cream

10 Sage leaves sliced.

150g pasta for the adults and

pasta portion appropriate for the child’s age

Pinch of nutmeg to taste

Seasoning to taste

Cheese to sprinkle on the top (parmesan, pecorino, cheddar – whatever is leftover)

Boil water for the pasta.

Fry the onion in oil until they are melting and soft, then add the mushrooms and garlic and cook until the mushrooms are browned. Then add the sage and stilton and stir until the stilton is mostly melted.  Add the cream, pepper and nutmeg.

When the water is boiling add the pasta and cook according to the instruction on the pack.

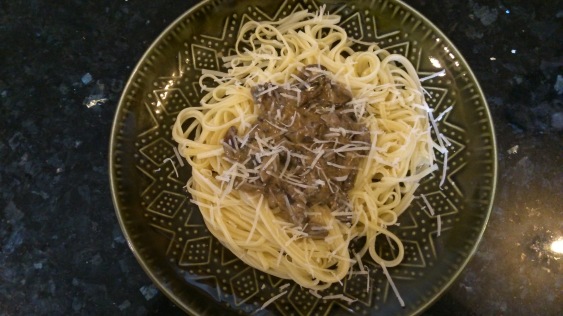
Serve sauce on top of pasta, sprinkled with cheese.

It is also great on baked potatoes or rice.


Voila.

Voila.


What is in the cake tin?

Recently we seem to have been buying a lot of cake – I’m not sure why. Probably because chasing after an excited crawling baby is a tiring business; it makes me (and Josh) want to eat cake.

As you know I’m in a constant internal battle on how much we use the mini-tesco over the road.  One day I’ll probably set myself a challenge or something and blog about it but today I’ve just resolved to make more cake so that we always have a cake tin of treats to be eaten rather than resorting to buying cakes.


Ready for the oven...

Ready for the oven…

This will be cheaper in the long run (I think, I’d better cost it up!) will involve less packaging, taste nicer and have things like free range eggs (i’m sure the average cake from Tesco’s don’t use free range eggs although I am pleased that Mr Kipling does) so should be all round greener.

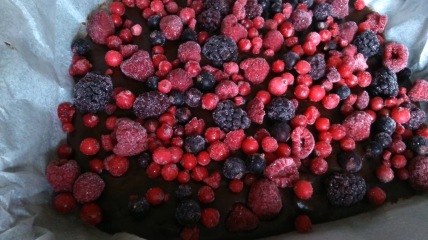
Finding myself with some unexpected baby-free time I set to work making these Black Forest Chocolate Brownies from the Pink Whisk.

Let’s try costing it out:

200g Dark Chocolate (Bournville) – £2.00

140g Butter – £0.56

225g Caster Sugar £0.34

2sp Vanilla Extract £0.47

2 eggs and 1 egg yolk £0.48

85g Plain Flour £0.03

200g Frozen Berries £1.00

33g Dried Cherries £1.00

£5.88 for 900g of Black Forest Brownies

Buying a similar weight of average quality Sainsburys Brownies would cost £4.00 on their current offer.  So not cheaper but the difference in quality is huge – So I feel like I’m not comparing like with like here.  Any ideas for a better comparison?

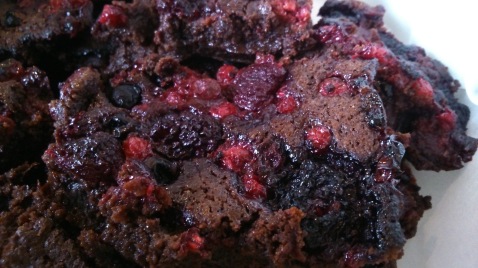
Surely this is better than a Sainsbury brownie.

Surely this is better than a Sainsburys’ brownie.

I’ve made the Black Forest Brownies before with my homegrown blackcurrants and they are just perfection.  This time I used frozen fruit as the recipe suggests because we are long way off the blackcurrant harvest.  As usual I “adjusted” the recipe –  but only by adding a good handful of dried sour cherries to give it an extra black forest vibe.

If I take all the berries and cherries out of the recipe (because the Sainsburys brownies don’t have any in them) the price is £3.88 for 900g which is a bit cheaper than buying from Sainsburys and it is still a million times nicer!

So frugal does win the day after all – what a relief.


Use it or Lose it Recipe – Breadcrumbs

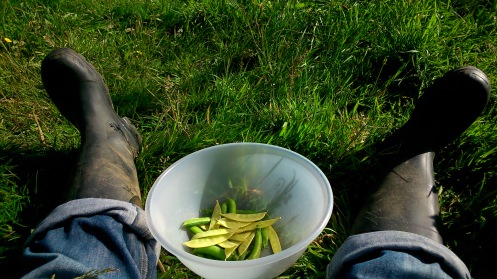
Shelling peas in the sun.

Shelling peas in the sun.

Today had its ups and downs (R took a little bit of a tumble, nothing serious but a bit of a shock and a sore bump for an already cross, teething baby). But there was a moment in the sunshine when I felt very happy and at peace.  I’d just picked our first pea harvest; mangetout are the yellow ones and Dwarf Early Peas the green ones.  I sat and shelled them by the veg patch so that I could toss the pea pods into the pig pen.  Pigs love things like that but they can’t eat food scraps that have been in a kitchen because of cross contamination.  So I made sure I shelled the peas in the sun, by the veg patch and the hedgerow while the pigs wuffled in the background.  It was lovely.

I’ve decided to make Use it or Lose it Recipes a regular feature on the blog.  I talked a little bit about food waste in the first Use it or Lose it Post.

We make our bread in a bread machine and whilst we use most of it up, there is often a crust or two leftover.  I save them up and then blitz them in the food processor for breadcrumbs.  Then I freeze them.  Breadcrumbs last ages in the freezer and if the bread is sufficiently stale they don’t seem to freeze together in one clump – this means you can take out one portion at a time and leave the rest of the bag in the freezer.

This recipe is for using up stale bread. There are lots of ways of using up stale bread as it happens and I’m sure I’ll come back to this particular type of leftover in the future. As a child my Dad made the most amazing stuffing for Sunday lunch.  He experimented with all sorts of flavours and herbs from the garden but my favourites were the sweetcorn stuffing and his mushroom stuffing.  The other day I was thinking about the huge bad of breadcrumbs sitting in the freezer and remembering the stuffing of my childhood.  I realised that stuffing doesn’t have to be relegated to a Sunday lunch side dish but would make a great lunchtime dish – especially as a good finger food for fat little baby hands. At the same time someone posted a recipe up on a baby-led weaning group on facebook which was basically stuffing and with a bit of tweaking from me I think I’ve got something just right.

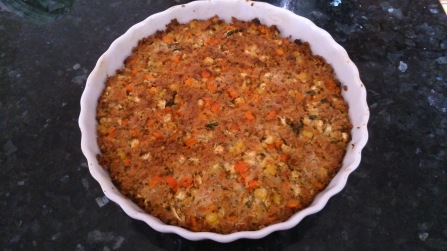
So this is my Lunchtime Special Stuffing – good for using up stale breadcrumbs AND wilted veg from the fridge.  Doesn’t that sound appetising? I’m sure Nigella Lawson would describe it as the mouth-crunchingly-perfect miniature beads of bread with juicy sweet carrots and sunshine-jewelled sweetcorn kernels.

Tasty lunchtime meal.

Tasty lunchtime meal.

This should serve 2 adults and 2 children for lunch with a salad/fruit.  It makes great picnic food for going out and about as well.

Ingredients

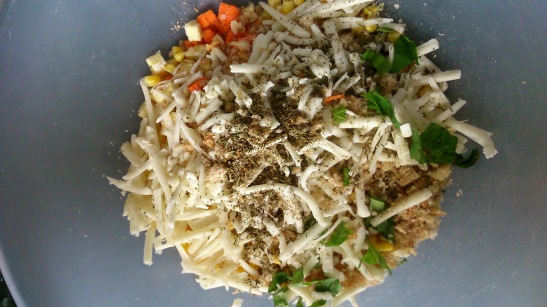
230g of shredded or finely chopped vegetables/herbs (I used carrots, sweetcorn, fresh basil and fresh parsley)

30g grated cheese (e.g. cheddar)

2 big handfuls of  breadcrumbs

2 medium eggs beaten

tablespoon butter

2 and 1/2 tsp of mixed dried herbs/spices

(I used 1 tsp dried thyme, 1 tsp marjoram, 1/2 tsp smoked paprika but use what you have – this is supposed to be a recipe about using things up – not buying lots more things)

Bowl of ingredients ready for mixin'

Bowl of ingredients ready for mixin’

Method

Preheat the oven to 190c/180fan/Gas Mark.

Mix all the above ingredients together until well combined.  Then either shape into individual patties or press into an oven dish. Personally I usually press it into an oven dish.  Sometimes I have the time to make ultra-cute baby sized portions of things, but this mixture is fiddly and messy and easier to put in a dish.

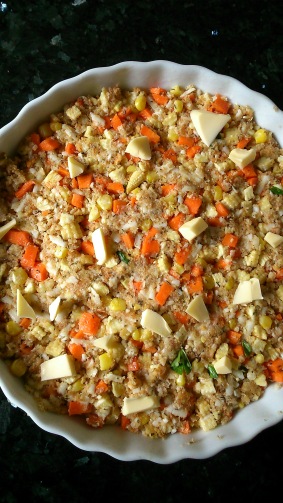
If you do make one big oven dish then dot the butter over the top.


Dotting with butter

Dotting with butter

Bake for about 25 mins until golden brown on top.

If you used an oven dish then now is the time to cut it into slices, otherwise just serve with fruit and salad.